Properly adjusted gears can make even an old bike feel new again. Crisp shifting isn’t just about smooth performance — it’s about efficiency, chain longevity, and confidence when you ride. Whether you’re fixing ghost shifts, a noisy drivetrain, or sluggish gear changes, this guide covers everything you need to index and adjust your bike gears like a pro, from setup to fine-tuning.
In this 2026 Best Bike Brands guide, we’ll show you exactly how to:
- Diagnose poor shifting
- Index your rear derailleur
- Adjust the front derailleur
- Fine-tune cable tension
- Keep your drivetrain running smooth and quiet
Let’s get your bike shifting like new again.
What Does “Indexing” Mean?
Indexing simply means aligning your shifters and derailleurs so that each click of the shifter corresponds perfectly to one gear on your cassette. When indexing is off, you’ll get:
- Delayed shifts (the chain hesitates before changing)
- Ghost shifts (the chain jumps gears on its own)
- Noise while pedaling, especially in certain gears
Modern drivetrains — from Shimano to SRAM and MicroSHIFT — rely on precise indexing to keep everything synchronized. Even a half-turn of a barrel adjuster can make the difference between perfect shifting and frustration.
Tools You’ll Need
Before diving in, gather these essentials:
- Bike stand (optional but makes life easier)
- 4mm and 5mm hex keys
- Phillips or flat-head screwdriver (for limit screws)
- Chain lube
- Clean rag or paper towels
- Work light (optional but helpful)
Pro Tip:
Always start with a clean drivetrain. Dirt buildup can mimic poor indexing symptoms.
Step 1: Understand the System
Before making adjustments, check:
- Cable condition — Frayed or rusty cables create resistance. Replace them if they look worn.
- Housing — Cracked or corroded housing will ruin indexing accuracy.
- Derailleur hanger alignment — A bent hanger throws off the derailleur’s geometry. Use a hanger alignment gauge if possible.
- Chain condition — A stretched chain won’t shift smoothly. Check wear with a chain checker.
If all components look sound, proceed with adjustment.
Step 2: Set the Rear Derailleur Limit Screws
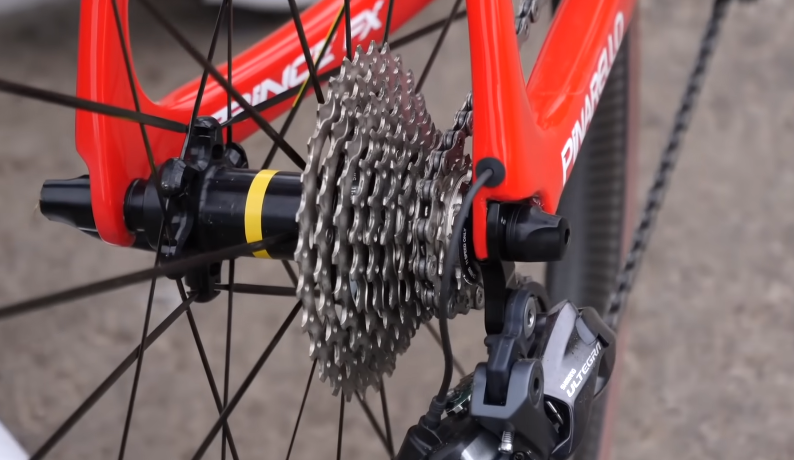
The rear derailleur has two limit screws — usually marked H (high) and L (low).
They control how far the derailleur can move inward (toward the wheel) and outward (toward the smallest cog).
Adjusting the High Limit Screw
- Shift to the smallest rear cog and largest front chainring.
- Pedal by hand and look from the rear — the upper jockey wheel should line up with that smallest cog.
- Turn the H screw clockwise to move the derailleur inward (toward the spokes) or counterclockwise to move it outward (away).
Goal: The jockey wheel should be perfectly in line with the smallest cog.
Adjusting the Low Limit Screw
- Shift to the largest rear cog and smallest front chainring.
- Look again from the rear — the upper jockey wheel should line up with the largest cog.
- Use the L screw to fine-tune. Clockwise moves the derailleur outward, counterclockwise inward.
Check clearance: The chain should not overshift into the spokes or hesitate to reach the biggest cog.
Step 3: Set the B-Tension (Body Angle Screw)
The B-tension screw adjusts the derailleur’s angle relative to the cassette, determining how close the upper pulley sits to the cogs.
- Shift to the largest rear cog.
- Turn the B-tension screw until the upper pulley sits about 5–6mm below the largest cog.
(SRAM setups may specify 15–18mm depending on model.) - Too close = noisy shifting. Too far = slow shifting.
This adjustment ensures smooth, accurate movement across the full gear range.
Step 4: Reset Cable Tension
This is where indexing begins.
- Shift to the smallest rear cog (highest gear).
- Turn the barrel adjuster (at the shifter or derailleur) clockwise until fully tight, then back it out one full turn.
- Loosen the derailleur’s cable pinch bolt.
- Pull the cable snug — not tight — and re-tighten the bolt.
You’ve now zeroed your starting point.
Step 5: Index the Rear Gears
Now, let’s dial it in perfectly.
- Pedal and shift one click to the next largest cog.
- If the chain hesitates or makes noise, turn the barrel adjuster counterclockwise (adds tension).
- If the chain jumps two gears or won’t move back down, turn the adjuster clockwise (reduces tension).
- Repeat step by step through all cogs until shifts are crisp both up and down.
Pro Tip: Always make micro-adjustments — one quarter-turn at a time. Over-adjusting is the #1 mistake.
Step 6: Check Shifting Under Load
Take the bike for a quick spin or simulate pedaling resistance on the stand.
Shift through all gears slowly, then rapidly.
Listen and feel for:
- Smooth transitions
- No hesitation between shifts
- No chatter in any gear
If the issue persists only in certain gears, the derailleur hanger may be slightly off.
Step 7: Front Derailleur Adjustment
Front shifting is simpler but equally important.
A noisy or rubbing front derailleur can ruin an otherwise perfect setup.
Step 7a: Check Height and Alignment
- The outer plate should sit 1–3mm above the largest chainring teeth.
- The cage should be parallel to the chainrings.
- If it’s too high, shifting will be sluggish. If too low, it can rub or scrape.
Step 7b: Set Limit Screws
Like the rear, front derailleurs have L (low) and H (high) screws.
Low Limit:
- Shift to the smallest chainring and largest rear cog.
- The inner cage plate should sit just clear of the chain (~0.5mm).
- Turn the L screw clockwise to move the cage outward or counterclockwise to move inward.
High Limit:
- Shift to the largest chainring and smallest rear cog.
- Adjust the H screw until the outer cage sits just clear of the chain with no overshift.
Step 7c: Fine-Tune Cable Tension
If the chain hesitates to climb to the big ring, add tension via the inline barrel adjuster.
If it overshifts, reduce tension slightly.
Step 8: Chain Line and Cross-Chaining Check
A properly indexed drivetrain should run smooth across most gears — but extreme chain angles (like big-to-big or small-to-small) will still create noise.
- Avoid big chainring + big cog (too much tension)
- Avoid small + small (chain slack, rub)
Tip: Educate customers (or readers) that “perfect silence” across every gear combo isn’t realistic — proper indexing simply ensures accuracy within the usable range.
Step 9: E-Bike and 1x Systems (Simplified Indexing)
Modern e-bikes and 1x drivetrains (single front chainring) simplify the process.
For 1x setups:
- You only adjust rear derailleur indexing — no front to worry about.
- Use clutch derailleurs (like Shimano Deore or SRAM GX) to keep chain tension high.
- Check chain length — e-bike torque amplifies wear faster.
E-bikes require the same principles but benefit from periodic cable inspection since higher mileage and vibration stretch cables faster.
Step 10: Maintenance & Long-Term Tips
- Check indexing every 2–3 months. Cable tension drifts slightly with temperature and use.
- Replace chains every 1,000–2,000 miles. Worn chains cause misalignment and premature cassette wear.
- Clean and lube regularly. Dirt increases resistance and affects tension.
- Use quality cables and housing. Cheap components stretch more and make micro-tuning harder.
Common Gear Adjustment Mistakes
| Mistake | Result | Fix |
|---|---|---|
| Turning barrel adjuster the wrong way | Shifts get worse | Remember: counterclockwise = tighter cable |
| Ignoring bent hanger | Won’t index properly | Realign or replace |
| Frayed cable under pinch bolt | Slippage | Trim and re-clamp |
| Dirty drivetrain | Ghost shifting | Clean and relube |
| Mixing brand parts (e.g., SRAM + Shimano) | Poor spacing | Stick to same brand shifter/derailleur |
Quick Reference: Direction Cheat Sheet
| Problem | Adjustment | Turn Which Way? |
|---|---|---|
| Hesitates to shift up (to larger cogs) | Cable too loose | Counterclockwise (add tension) |
| Hesitates to shift down (to smaller cogs) | Cable too tight | Clockwise (reduce tension) |
| Chain overshoots into spokes | Low limit too loose | Tighten L screw |
| Chain won’t reach biggest cog | Low limit too tight | Loosen L screw |
| Chain won’t reach smallest cog | High limit too tight | Loosen H screw |
Who Should Adjust Their Own Gears?
Anyone with basic tools and patience can index gears successfully.
It’s one of the best DIY maintenance skills you can learn because it:
- Saves $40–$80 per shop visit
- Extends drivetrain life
- Makes your rides smoother and quieter
If you’re intimidated, start with minor barrel adjustments before touching limit screws. Small steps lead to big improvements.
Frequently Asked Questions (FAQ)
Q: How often should I index my gears?
Every few months or anytime shifting starts to feel rough or noisy. Cable tension naturally drifts with use.
Q: Can I index electronic shifting systems (Di2, AXS)?
Yes, but through the brand’s app or onboard micro-adjust system. Follow manufacturer procedures.
Q: Why does my new cable stretch so fast?
All new cables “settle” after a few rides. Retensioning once after installation is normal.
Q: Should I use oil or grease on cables?
Light cable-specific lube is fine. Grease can attract dirt and slow shifting.
Q: What if shifting is still bad after indexing?
Check derailleur hanger alignment — it’s often the hidden culprit behind persistent problems.
Final Thoughts
Properly indexed gears are the difference between frustration and flow on every ride.
Once you understand how each adjustment interacts — limit screws, cable tension, and B-tension — the process becomes second nature.
If you ride often, add gear indexing to your seasonal maintenance routine alongside chain cleaning and brake inspection. It’s a simple way to keep your bike fast, quiet, and fun to ride.
Related Content:
- Best Budget Friendly E-Bikes
- How to Pack a Bike
- How to Wash a Bike Safely
- Best Comfort Saddles
- Best Disc Brakes Guide
Why Trust This Guide
Jeffrey South is the founder of Best Bike Brands. With over 30 years in the cycling world as a shop owner, mechanic, and industry insider, he now shares reviews, guides, and insights to help riders choose the best bikes and gear with confidence.


