Introduction
Choosing the right bike size is one of the most important decisions you’ll make when buying a new bike. Whether you’re shopping for your first road bike, a mountain bike, or an e-bike, the fit affects everything—comfort, efficiency, and even safety.
A bike that’s too small feels cramped, awkward, and tiring. A bike that’s too large feels unstable and difficult to control. Yet, sizing confusion is one of the most common mistakes new riders make—often because each brand measures frames differently, and online charts can be misleading.
This 2026 guide breaks down how to measure yourself, how to read geometry charts, and how to choose the correct frame size across all bike types. By the end, you’ll know exactly what to look for before you buy.
Why Proper Bike Fit Matters
The right bike size ensures:
- Comfort – Less fatigue on long rides.
- Efficiency – Better power transfer with each pedal stroke.
- Injury Prevention – Reduces strain on knees, hips, and back.
- Control – Confidence in corners, descents, and stops.
Riding a poorly sized bike often leads to numb hands, sore knees, or lower back pain. Over time, that discomfort can make you stop riding altogether. That’s why proper sizing isn’t just about performance—it’s about longevity.
Step 1: Measure Your Body Correctly
Before you look at charts or geometry numbers, you need your own key body measurements. You can do this at home with a tape measure, a wall, and a book.
1. Inseam (Most Important)
This is the distance from your crotch to the floor while standing straight with bare feet.
How to measure:
- Stand against a wall with feet 6–8 inches apart.
- Place a hardcover book snugly between your legs, mimicking saddle pressure.
- Measure from the top of the book to the floor.
Pro Tip: Do this with a friend for accuracy. Record in centimeters for consistency with most sizing charts.
2. Height
Measure your full height without shoes. This gives you a general range to compare against manufacturer charts.
3. Arm and Torso Length (Optional for Road/Gravel Riders)
For advanced fitting:
- Torso Length = Sternum to top of pelvis.
- Arm Length = Shoulder joint to wrist bone.
These help determine reach and handlebar comfort.
Step 2: Understanding Frame Geometry
Bike size isn’t just a single number—it’s a combination of geometry factors that define fit and ride feel.
| Geometry Term | What It Means | Why It Matters |
|---|---|---|
| Top Tube Length | Distance from seat tube to head tube | Affects reach and posture |
| Seat Tube Length | Height of the seat post insertion area | Determines standover and frame height |
| Stack | Vertical height from bottom bracket to head tube | More stack = upright, less aggressive |
| Reach | Horizontal distance from bottom bracket to head tube | Longer reach = sportier, shorter reach = comfort |
| Standover Height | Clearance between top tube and crotch | Should be 1–2 inches (road), 2–4 inches (MTB) |
Understanding these helps you look beyond generic “Small, Medium, Large” labels. Two bikes both labeled Medium might fit completely differently.
Step 3: General Sizing by Bike Type
Each category of bike has its own sizing conventions. Here’s what to know for each.
Road Bikes
Road bikes are sized by frame height (in cm), typically ranging from 47–64 cm. Use this quick reference:
| Rider Height | Inseam (cm) | Frame Size (cm) |
|---|---|---|
| 4’10″–5’1″ (147–155 cm) | 66–70 | 47–49 cm |
| 5’2″–5’5″ (157–165 cm) | 71–75 | 50–52 cm |
| 5’6″–5’9″ (167–175 cm) | 76–79 | 53–55 cm |
| 5’10″–6’0″ (178–183 cm) | 80–84 | 56–58 cm |
| 6’1″–6’3″ (185–191 cm) | 85–88 | 58–60 cm |
| 6’4″+ (193 cm+) | 89+ | 61–64 cm |
Tips:
- Race bikes have longer reach and lower stack.
- Endurance models have shorter reach, more upright position.
Mountain Bikes
MTBs are usually labeled S, M, L, XL, but each brand varies. Use height as a starting point:
| Rider Height | Frame Size |
|---|---|
| 4’10″–5’2″ | XS |
| 5’3″–5’6″ | S |
| 5’7″–5’10” | M |
| 5’11″–6’1″ | L |
| 6’2″–6’5″ | XL |
Pro Tip: Mountain bikes are more forgiving thanks to dropper posts and adjustable stems. Always check reach and standover for fine-tuning.
Hybrid / Fitness Bikes
Hybrids combine road comfort and commuter geometry. They’re usually sized in inches.
| Rider Height | Frame Size (inches) |
|---|---|
| 4’10″–5’2″ | 13–14″ |
| 5’3″–5’6″ | 15–16″ |
| 5’7″–5’10” | 17–18″ |
| 5’11″–6’1″ | 19–20″ |
| 6’2″–6’5″ | 21–22″ |
If you’re between sizes, choose the smaller for comfort and standover clearance.
Gravel Bikes
Gravel bikes share sizing with road bikes but offer more relaxed geometry and wider tire clearance.
- Use your road bike size as a starting point.
- Consider a smaller frame if you prefer a more upright fit or rougher terrain.
E-Bikes
E-bikes vary widely by style—commuter, mountain, folding, or cargo. Many come in fewer sizes (S/M/L), so pay attention to standover and reach.
- Step-thru frames offer the easiest sizing flexibility.
- Hub-drive models tend to run smaller due to battery placement.
Note: Always test an e-bike before purchase—battery weight and geometry make fit feel very different from analog bikes.
Kids Bikes
For kids, sizing is based on wheel diameter, not frame size.
| Age | Height | Wheel Size |
|---|---|---|
| 3–5 | 36–40″ | 12″ |
| 5–7 | 41–46″ | 16″ |
| 7–9 | 47–52″ | 20″ |
| 9–11 | 53–58″ | 24″ |
| 11+ | 59″+ | 26″ (Small adult) |
Pro Tip: Don’t oversize a kid’s bike—they’ll feel unstable and lose confidence.
Step 4: Fine-Tuning the Fit
Frame size is just the foundation. The real fit comes from adjusting the contact points—saddle, handlebars, and pedals.
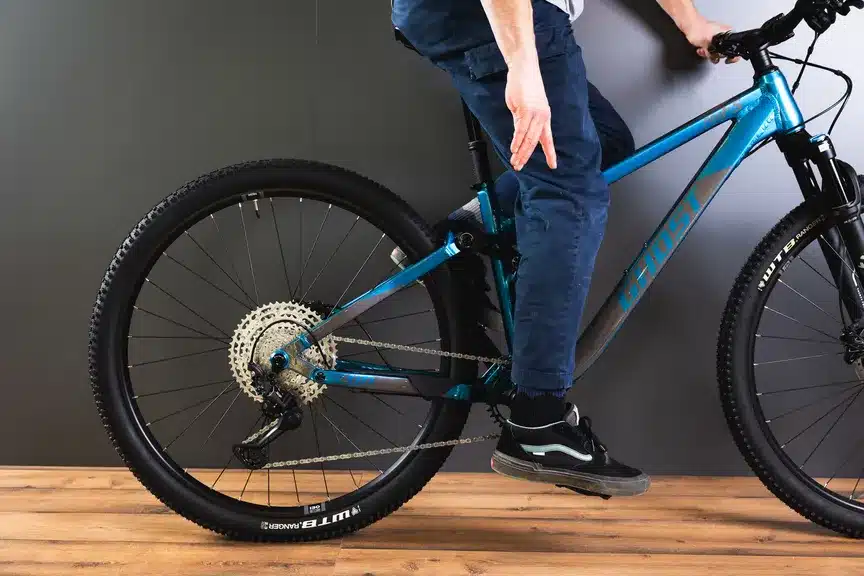
Saddle Height
Your leg should have a slight bend (25–35°) at full pedal extension.
Too high = hips rock side to side.
Too low = knee strain and poor power.
Quick Method:
- Sit on the saddle.
- Place heel on pedal at bottom stroke.
- Your leg should be fully straight.
Reach and Handlebar Position
Reach is how stretched you feel on the bike. You should be able to rest your hands lightly on the bars without locking elbows.
Adjust with:
- Shorter or longer stem.
- Handlebar spacers (raise/lower height).
- Flipping the stem angle for comfort.
Saddle Fore/Aft
With pedals level, your forward knee should align roughly over the pedal axle. Adjust fore/aft until balanced.
Tire Pressure & Cockpit Setup
Once fit is dialed, fine-tune ride feel with tire pressure and handlebar angle. Comfort is cumulative—small tweaks make a big difference over long rides.
Step 5: Brand-Specific Sizing Differences
Even within the same size label, two Mediums from different brands can feel worlds apart. Here’s why:
| Brand | Fit Tendency | Notes |
|---|---|---|
| Specialized | Balanced | Easy-to-fit geometry for most riders |
| Trek | Slightly compact | Endurance-focused |
| Giant | Long reach | Race-oriented |
| Cannondale | Tall stack | Comfortable, upright |
| Santa Cruz | Aggressive MTB fit | Longer reach, slacker angles |
| Ride1Up / Aventon (E-bikes) | Compact | Short reach, lower standovers |
Always check the brand’s geometry chart for exact stack/reach before ordering.
Step 6: Common Sizing Mistakes
1. Buying by Height Alone
Height is a starting point, not a rule. Two riders 5’9” tall may have completely different inseams and reach.
2. Ignoring Reach and Stack
Frame height doesn’t equal comfort. Always confirm stack/reach when shopping online.
3. Setting Saddle Too High or Low
This is the #1 cause of knee pain. Always adjust properly before riding.
4. Forgetting Crank Length
Shorter riders benefit from 165–170 mm cranks. Taller riders may need 175 mm.
5. Overlooking Gender Differences
Women’s-specific bikes often feature shorter reach and narrower handlebars. However, many unisex bikes fit just as well with correct adjustments.
Step 7: How to Choose When You’re Between Sizes
If you fall between two frame sizes, here’s a simple rule:
- Performance / Aggressive Riding: Go larger for more stability.
- Comfort / Commuting: Go smaller for easier control and upright posture.
A proper stem and saddle setup can make either size work, but starting closer to your comfort goal saves money on adjustments.
Step 8: Using Online Fit Calculators (2026 Updates)
Brands and fit apps have become more accurate thanks to AI and better geometry databases. For 2026, the most reliable sizing calculators include:
- Competitive Cyclist Fit Calculator – Great for road and gravel.
- Canyon Fit System – Works directly with their bike geometry.
- Specialized Retül – For in-person fitting and body motion capture.
- Ride1Up Fit Guide – Simple e-bike sizing visualizer.
Use these to cross-check your measurements before ordering online.
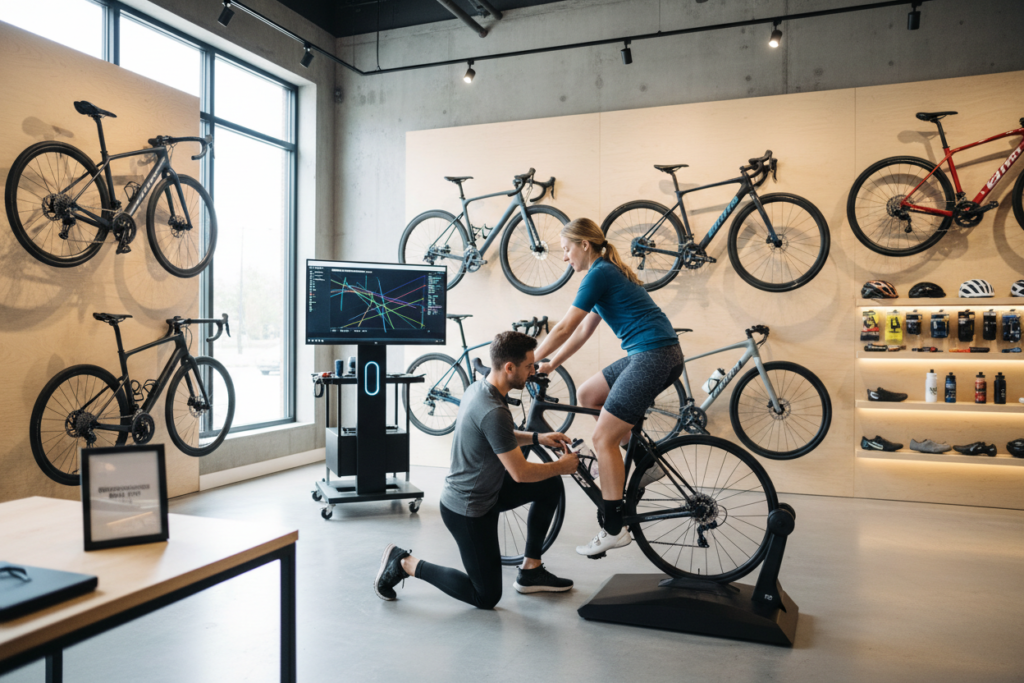
Step 9: Get a Professional Fit (If You Can)
Even with perfect charts, a professional bike fit can transform your ride. Expect to pay $100–$250 for a full session, which includes:
- Motion capture or dynamic fitting
- Cleat and saddle alignment
- Bar and stem adjustments
For riders doing long-distance road, gravel, or e-bike touring—it’s worth every penny.
Final Thoughts
Choosing the right bike size isn’t guesswork—it’s a process that combines your measurements, bike geometry, and riding goals.
When in doubt, remember these key takeaways:
- Measure your inseam accurately—it’s your most critical number.
- Use brand-specific charts, not generic ones.
- If between sizes, smaller is usually safer for comfort.
- Don’t forget post-purchase fine-tuning—fit evolves as you ride.
A properly sized bike feels like an extension of your body. You’ll ride longer, faster, and with more confidence every time you swing a leg over.
Related Content:
- Best Road Bikes
- How to Pack a Bike
- How to Wash a Bike Safely
- Best Commuter Bikes Guide
- Best E-Bike Brands
Why Trust This Guide?
BestBikeBrands is built by lifelong cyclists with decades of real-world experience — in the shop, on the trail, and behind the wrench. Our goal is simple: to help riders choose the best bikes and gear with confidence, backed by expert insights and hands-on testing. Learn more about us →
