Modern mountain bike suspension is more capable, tunable, and refined than ever before. Air-spring progressivity, adjustable volume spacers, high/low-speed damping circuits, and sophisticated shock kinematics have elevated the performance of trail, enduro, XC, and e-MTB platforms. But none of that matters if your suspension isn’t set up correctly. Even the most advanced fork or shock feels harsh, unpredictable, or unstable when not dialed.
A proper full-suspension setup transforms your bike. It unlocks traction where you previously slipped, support where the bike once wallowed, and confidence where terrain once felt intimidating. The difference between a poorly set-up bike and a properly tuned one can feel like two entirely different machines.
This guide walks you through the complete setup process—from sag to air pressure, rebound, compression, balance, volume spacers, and final trail tuning. Whether you’re experienced or brand new to suspension tuning, this step-by-step system gives you a clean, repeatable method to get your bike handling exactly how it should.
Key Points
- Sag is the foundation of all good suspension setup.
- Rebound and compression should be set after sag and air pressure.
- Fork and shock balance matter more than perfect numbers.
- Volume spacers change bottom-out feel, not sag.
- Small adjustments (1–2 clicks or 2–3% sag) make major differences.
- Proper setup stabilizes geometry and increases traction, control, and comfort.
- Record settings and adjust gradually—never all at once.
1. Understanding the Suspension System
A mountain bike’s suspension system consists of two main components:
Fork (Front Suspension)
- Controls front wheel traction
- Influences steering stability
- Affects braking behavior and comfort
Shock (Rear Suspension)
- Controls rear wheel traction
- Influences pedaling stability
- Dictates mid-stroke support and bottom-out resistance
- Directly affects geometry
Full suspension works best when both ends are tuned to work together. This guide focuses on dialing in that balance.
2. Step One: Verify Your Bike’s Baseline Settings
Before adjusting anything:
1. Check manufacturer recommendations
Frame and suspension brands often publish:
- Sag targets
- Pressure charts
- Rebound/compression recommendations
- Volume spacer guidance
These baselines are your starting point—not your final settings.
2. Inspect suspension condition
Setup doesn’t fix mechanical issues. Check:
- No oil leaks
- Clean stanchions
- Air pressure holds overnight
- Fork and shock move freely
- All bolts torqued
3. Wear full riding gear
Sag and support must reflect your real riding weight, including:
- Shoes
- Pack
- Tools
- Water
- Helmet
Now you’re ready to start.
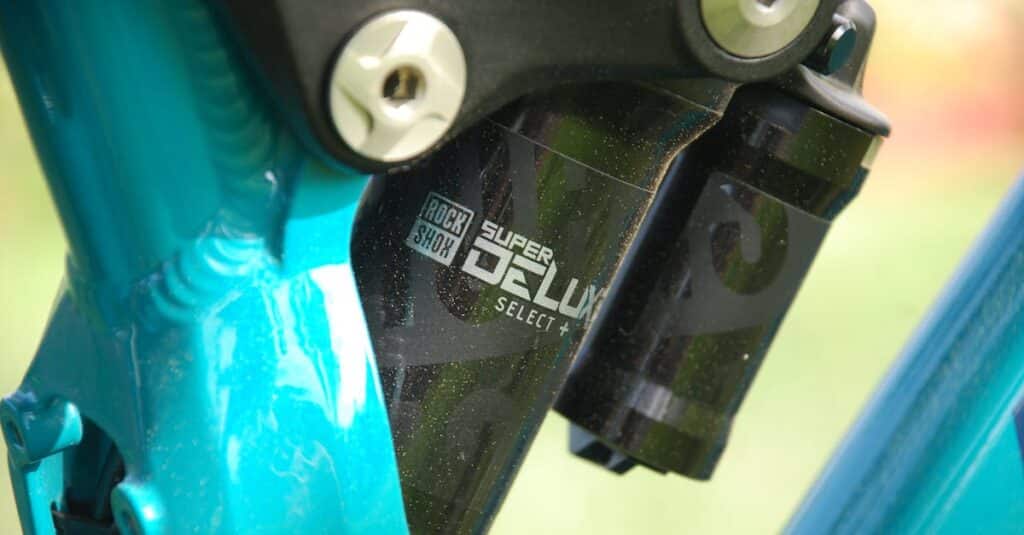
3. Step Two: Set Sag (The Foundation)
Sag determines where your suspension sits in its travel when loaded with body weight. Everything else—rebound, compression, support, bottom-out resistance—depends on this step.
Recommended Sag Targets
| Discipline | Fork | Shock |
|---|---|---|
| XC | 10–15% | 20–25% |
| Trail | 15–20% | 25–30% |
| Enduro | 20–25% | 28–33% |
| E-MTB | 15–20% | 25–30% |
See your dedicated sag guide if desired.
Here’s the short version:
How to Set Fork Sag
- Slide O-ring to the wiper.
- Stand in attack position.
- Bounce lightly and settle.
- Have a friend steady the bike.
- Carefully step off.
- Measure travel used.
- Add/remove air pressure until sag target is reached.
How to Set Shock Sag
- Slide O-ring to the shock body.
- Sit or stand in neutral riding position.
- Bounce once and settle.
- Have someone steady the bike.
- Step off vertically.
- Measure sag.
- Adjust pressure (air) or preload (coil) until target value is hit.
Rule of thumb:
If the rear feels vague or sits too deep → less sag.
If the bike lacks traction or feels harsh → more sag.
Once sag is dialed, move to rebound.
4. Step Three: Rebound Adjustment (Controlling Return Speed)
Rebound controls how quickly your suspension returns to full extension after compressing. Too fast or too slow creates instability.
The Rebound Spectrum
- Too Fast (Too Open):
- Bike feels bouncy
- Front wanders in corners
- Rear kicks you on drops
- Harsh chatter on fast hits
- Too Slow (Too Closed):
- Suspension “packs down”
- Feels dead or stuck
- Front dives in rock gardens
- Rear squats and loses traction
Goal:
Fast enough to recover fully between bumps; slow enough to stay controlled.
How to Set Fork Rebound
- Start with manufacturer recommendation.
- Find a curb, rock, or small ledge.
- Ride off slowly and observe fork return.
- Adjust one click at a time:
- If the front pogo-sticks → close rebound 1–2 clicks.
- If the fork stays compressed → open 1–2 clicks.
Advanced Check
On fast bumps, your fork should return quickly but without “overshooting.”
If repeated hits cause the fork to dive lower each time → rebound too slow.
How to Set Shock Rebound
The rear wheel needs slightly slower rebound than the fork—too fast and it becomes uncontrollable.
Trail Test
Find repeated bumps or roots:
- If the rear hops → too fast.
- If it sinks deeper each hit → too slow.
- If the bike feels evenly balanced → correct.
Rear rebound strongly influences cornering.
If the bike stands up mid-corner → rebound too slow.
If the bike drifts or loses traction → rebound too fast.
5. Step Four: Compression Settings (Support & Control)
Compression damping controls how suspension behaves during compression.
Low-Speed Compression (LSC)
Affects:
- Pedaling support
- Brake dive
- Cornering support
- Body-weight shifts
LSC is your “platform.”
High-Speed Compression (HSC)
Affects:
- Impacts
- Square edges
- Landings
- Big hits
HSC shapes bottom-out control.
How to Set LSC (Fork)
- Start fully open.
- Add clicks until fork:
- Resists brake dive
- Stays supportive in corners
- Still feels smooth on bumps
If harsh → reduce LSC.
How to Set LSC (Shock)
LSC influences pedaling feel.
Too much → harsh + no traction.
Too little → wallow + poor support.
Start with a light platform and adjust:
- More LSC for climbing efficiency.
- Less LSC for traction and plushness.
How to Set HSC (If Available)
Only adjust after you’ve tested support and bottom-out characteristics.
Add HSC if:
- You frequently bottom out
- Big hits feel uncontrolled
- Bike dives into deep travel quickly
Reduce HSC if:
- Bike feels harsh on square edges
- Back wheel deflects instead of tracking
6. Step Five: Balance Between Fork & Shock
This is where most riders get setup wrong.
You can nail sag, rebound, and compression independently…
…but if the fork and shock aren’t balanced, the bike still feels unstable.
Signs of Bad Balance
- Bike feels “see-saw-y”
- Rear squats while fork stays high
- Fork dives but rear stays firm
- Front traction inconsistent
- Bike stands upright mid-corner
The Goal
Front and rear should move in harmony, settling evenly under:
- Braking
- Acceleration
- Pumping
- Cornering
- Drops
Quick Balance Test
- Roll slowly and brake hard.
- If fork dives more → increase fork LSC or lower shock LSC.
- If rear collapses → add shock pressure or LSC.
- If the bike feels neutral → balance is good.
7. Step Six: Volume Spacers (Spring Curve Tuning)
Volume spacers change how suspension behaves deep in travel, NOT sag.
More Spacers = More Progressive
- Harder to bottom out
- More pop
- Better for aggressive riders
Fewer Spacers = More Linear
- Softer mid-stroke
- Better traction
- Smoother small bumps
When to Add Spacers
- Frequent bottom-outs
- Desire more mid-stroke support
- Jumping or bike-park riding
When to Remove Spacers
- Harsh mid-stroke
- Never using full travel
- Bike feels too stiff on rough terrain
Always recheck sag after volume spacer changes.
8. Step Seven: On-Trail Fine Tuning
Once your base setup is done, it’s time to test on your local trails.
Key Areas to Evaluate
- Traction in corners
- Stability under braking
- Use of full travel (but not too frequently)
- Predictability in rock gardens
- Balance front-to-rear
Trail Tuning Method
- Adjust one thing at a time.
- Ride the same section after each change.
- Take notes.
- Don’t chase perfection—chase predictability.
Common Adjustments
- Add LSC to fork for brake-dive issues
- Reduce shock rebound for more traction
- Add air to rear shock for mid-stroke wallow
- Remove a spacer for more compliance
This iterative process is where your setup becomes yours.
9. Example Starting Setups
These are baseline examples, not universal rules.
Trail Bike (140–150 mm)
- Fork: 20% sag, rebound 6–8 clicks from closed
- Shock: 28% sag, rebound 5–7 clicks
- LSC: light-medium
- HSC: open or 1–2 clicks
- Volume spacers: 1–2 (fork), 0–1 (shock)
Enduro Bike (160–180 mm)
- Fork: 20–25% sag
- Shock: 30–33% sag
- LSC: medium
- HSC: 2–4 clicks
- Volume spacers: 2–3 (fork), 1–2 (shock)
E-MTB
- Higher fork/shock pressures
- Sag slightly lower (to counter e-bike weight)
- More progression often required
10. When to Recheck Suspension Settings
- After 10–15 rides
- After service or rebuild
- After significant temperature changes
- After long road transports
- Anytime the bike “feels different”
Suspension is dynamic; perfect setup requires revisiting occasionally.
Final Thoughts
A proper full-suspension setup transforms how a mountain bike handles. Instead of guessing, this structured method ensures your fork, shock, rebound, compression, and progression work in harmony. Sag provides the foundation. Rebound and compression shape the feel. Volume spacers control the deep stroke. Balance brings everything together.
A well-set bike corners with more grip, climbs more efficiently, descends with more confidence, and feels smoother and faster everywhere. This guide gives riders a clear, repeatable system to dial in suspension from the first ride onward — no mystery, no guesswork, just predictable performance.
FAQ
How long does a full suspension setup take?
30–60 minutes for basic setup; longer if tuning with spacers.
Should fork and shock sag match?
No. Fork sag usually 15–20%; shock sag 25–30%. The goal is balance, not identical numbers.
What affects suspension the most?
Sag and rebound. Compression and spacers refine the feel but sag is the foundation.
Do volume spacers change sag?
No. They only change mid-to-end-stroke progression.
Should I set rebound before compression?
Yes. Rebound determines recovery and stability; compression fine-tunes support.
Is suspension different on e-MTBs?
Heavier bikes require slightly less sag, more progression, and more support.
Can I do this setup alone?
You can set fork sag alone, but rear sag and balance require a second person.
Related Content:
- DW-Link vs Switch Infinity
- Best Mountain Bike Brands
- How to Set Sag
- Santa Cruz Bikes Review
- Yeti Bikes Review
Why Trust This Guide?
BestBikeBrands is built by lifelong cyclists with decades of real-world experience — in the shop, on the trail, and behind the wrench. Our goal is simple: to help riders choose the best bikes and gear with confidence, backed by expert insights and hands-on testing. Learn more about us →