Introduction
Your bike is built to handle dirt, rain, and the occasional mud bath — but that doesn’t mean you should ignore cleaning it. A proper wash not only keeps your bike looking sharp but also extends the life of your drivetrain, brakes, and frame. Done wrong, though, you can force water into bearings, strip grease, or scratch your paint.
In this guide, we’ll walk you through the safest way to wash your bike, including the tools you’ll need, step-by-step instructions, common mistakes to avoid, and a maintenance routine to keep your ride performing at its best.
Whether you’re riding a $500 commuter or a $5,000 e-bike, these tips apply across the board.
Tools & Supplies You’ll Need
Before you start, gather your cleaning kit. Having everything ready prevents shortcuts that could damage your bike.
- Bucket of warm water (with mild dish soap or bike-specific cleaner)
- Bike stand (optional, but makes life easier)
- Soft-bristle brushes (large for tires/frame, small for drivetrain)
- Sponge or microfiber cloths
- Degreaser (bike-safe only, no harsh solvents)
- Chain cleaning tool (optional but recommended)
- Hose with spray nozzle (low pressure only)
- Chain lube (wet or dry depending on conditions)
- Old towels (for drying)
–> Recommended Products:
Step 1: Prep the Bike
- Shift your bike into the small chainring and small cog. This releases tension on the drivetrain and makes cleaning easier.
- Mount your bike in a stand if you have one. If not, lean it gently against a wall.
⚠️ Avoid upside-down cleaning — flipping your bike can let water and degreaser seep where you don’t want it.
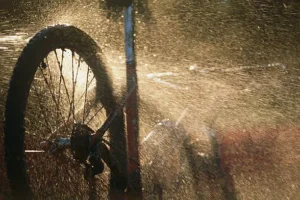
Step 2: Rinse (Lightly!)
- Use a gentle spray from a hose or garden sprayer.
- Rinse off loose dirt, mud, and grit from the frame, tires, and drivetrain.
- Never use a pressure washer — high-pressure water can blast grease out of hubs, bottom brackets, and suspension pivots.
Step 3: Wash the Frame
- Dip a sponge or soft brush into your soapy water.
- Scrub the frame, fork, handlebars, saddle, and wheels.
- Work from top to bottom so dirt flows downward.
- Use a separate sponge for the drivetrain to avoid cross-contamination.
Step 4: Clean the Drivetrain
The drivetrain is the dirtiest part of your bike — and the most critical to maintain.
- Apply degreaser to the chain using a chain tool or brush. Let it sit for 2–3 minutes.
- Scrub the cassette, chainrings, and derailleur pulleys with a small brush.
- Rinse gently with water to flush away grime.
⚠️ Don’t soak your bottom bracket or hub area in degreaser — target only the moving drivetrain parts.
–> Recommended Products:
Step 5: Rinse Again
- Give the bike a light second rinse to wash away all soap and degreaser.
- Again: low pressure only.
Step 6: Dry Thoroughly
- Wipe the frame and wheels with clean towels.
- Bounce the bike gently on the ground to shake out water.
- Let it sit in a shady, ventilated area until fully dry.
Step 7: Lube the Chain
A clean, dry chain needs fresh lube immediately.
- Drip chain lube onto each roller while backpedaling slowly.
- Let it soak in for 5 minutes.
- Wipe off the excess with a cloth — only the inside of the chain needs lubrication.
–> Recommended Products:
Common Mistakes to Avoid
- Pressure washers — they destroy bearings.
- Household degreasers (like Simple Green Original) — too harsh for bike components.
- WD-40 as lube — it’s a cleaner, not a lubricant.
- Skipping lube — a clean but dry chain will rust fast.
- Leaving water spots — moisture left in bolts and cables can lead to corrosion.
Maintenance Frequency
- After every wet/muddy ride: quick rinse + drivetrain wipe + relube.
- Every 2–4 weeks: full wash like this guide.
- Every 6 months: deep drivetrain clean (cassette off, pulleys removed, full degrease).
Comparison: Bike Washing Methods
| Method | Pros | Cons | Best For |
|---|---|---|---|
| Full bucket & brush | Safe, thorough, cheap | Takes ~30 min | Most riders |
| Hose rinse + quick wipe | Fast, minimal effort | Doesn’t deep clean drivetrain | Commuters |
| Portable bike washer (low-pressure) | Mobile, eco-friendly | $100–$300 investment | Apartment dwellers, vanlifers |
| Shop ultrasonic clean | Deepest clean possible | Costs $30–$60 | Heavily used drivetrains |
Which Method Should You Use?
- Choose bucket & brush if you want a safe, thorough clean at home.
- Choose quick rinse if you just need to knock dirt off your commuter bike.
- Choose portable washer if you live in an apartment or need mobile cleaning.
- Choose ultrasonic clean at your local shop if your drivetrain is caked or shifting poorly.
Shop for Supplies
| Product | Type | Best For | Price Range | Shop |
|---|---|---|---|---|
| Muc-Off Bike Cleaning Kit | Complete Kit | All-in-one cleaning solution | $35–$50 | Shop Muc-Off Kit |
| Finish Line Grunge Brush + Degreaser | Brush + Degreaser | Targeting drivetrain grime | $15–$20 | Shop Finish Line Brush |
| Park Tool Chain Cleaning System | Chain Cleaner | Deep chain cleaning | $25–$35 | Shop Park Tool Cleaner |
| WD-40 Bike Cleaner (Bike-Specific) | Bike Wash Spray | Quick frame + wheel wash | $10–$15 | Shop WD-40 Bike Wash |
| ProGold ProLink Chain Lube | Chain Lube | Post-wash chain lubrication | $12–$15 | Shop ProLink Lube |
Final Verdict
Washing your bike isn’t complicated, but doing it safely is the difference between a shiny ride and a trip to the repair shop.
Keep the water pressure low, use bike-friendly cleaners, and always relube your chain afterward. Follow this guide, and your bike will not only look great but also ride smoother and last longer.
Remember: a clean bike is a fast bike — and a happy bike.
Related Links
- Best Chain Lubes for 2025
- Best Bike Repair Stands
- How to Maintain Your E-Bike Battery
- Best Bike Cleaning Kits
Why Trust This Guide?
Jeffrey South is the founder of Best Bike Brands. With over 30 years in the cycling world as a shop owner, mechanic, and industry insider, he now shares reviews, guides, and insights to help riders choose the best bikes and gear with confidence.


